
![]() Git is more than just an awesome, decentralized version control system (VCS) – it can also drive lots of useful automation by triggering actions to deploy infrastructure and services based on event and commit-based hooks. You can drive a lot of complex automation with this functionality but I’m going to provide you with a simple example using a Git repo to push web content to a remote webserver.
Git is more than just an awesome, decentralized version control system (VCS) – it can also drive lots of useful automation by triggering actions to deploy infrastructure and services based on event and commit-based hooks. You can drive a lot of complex automation with this functionality but I’m going to provide you with a simple example using a Git repo to push web content to a remote webserver.
Git Hooks – Overview
Git hooks are either client-side or server-side actions that can be taken based on commit behavior. We’re going to be focusing on server-side hooks in this post, of these there are three types:
- pre-receive – scripts that can run when a push is received, this usually comes in the form of sanity checking, pre-push maintenance or access control
- update – very similiar to pre-receive except it’s run per git branch.
- post-receive – scripts that can be run after a push is accepted and merged, this is where we will focus our examples. Useful examples might be to send an email, copy or perform some action or send a notification to IRC or other medium.
Simple Post-Receive Hook Example
In this example I’ll show you how to manage static web content via Git post-receive hooks. For our example we will need a testing VM or server which we’ll call host-01, we’ll assume you already have something like this already.
- Linux Server VM (we are using CentOS 7)
- Remote Git Repo (we will create this)
Getting Started – Create a Git Repo
First we’ll create a remote Git repo on the server. The following commands should be run as root on your remote server – we’ll refer to that as host-01.
Create a User for Git
useradd repouser
repouserpass=`date | md5sum | cut -c1-10` && echo "$repouserpass" \
 | passwd repouser --stdin && echo "password is $repouserpass"
Setup SSH Key Access
This user will host our Git repo accessible over SSH. Now you’ll want to copy over your public SSH keys for access from your machine if you don’t want to use passwords. Run this from the machine and user you’ll be pushing changes from (laptop, desktop, another VM etc). Note the password on the screen above for the next command.
ssh-copy-id repouser@host-01
This should prompt you for the password once, after that you’ll no longer need a password so long as you have invoked your ssh-agent via the ssh-add command upon logging in to your local machine.
Number of key(s) added: 1

Now try logging into the machine, with:   "ssh 'repouser@host-01'"
and check to make sure that only the key(s) you wanted were added.
Once you have access it’s recommended to disable password logins going forward. New users can be added by putting their SSH public key inside the ~/.ssh/authorized_keys file on the remote system.
Create the Git Repo on Remote Server
Install Git on the remote server host-01.
yum install git -y
Now become the repouser and create the repo locally and enter it.
su - repouser
mkdir website-repo
cd !$
Now you’ll create the bare repo on the server.
git init --bare
At this point you’ll have a bare repo setup, accessible to clone and use via SSH.
Clone your Repo Locally
Now you’re ready to start using the password repository. First you’ll want to clone it somewhere locally like your laptop/desktop. In this example we’ll be cloning it into a directory called website-repo.
git clone ssh://repouser@host-01/home/repouser/website-repo/ website-repo
You should see something like below, also noting it’s currently empty.
Cloning into 'website-repo'...
 warning: You appear to have cloned an empty repository.
 Checking connectivity... done.
Add Content for First Commit
You now have a Git repo, however you have no branches within it and you need at least one. Let’s create a master branch so you’re ready to add new content. Change directory into website-repo and create an empty file.
cd website-repo && echo "testing" > index.html
git add index.html
Push the Commit
git commit -m "adding first content"
git push origin master
You should now see something like following, showing you successfully pushed the content.
Counting objects: 3, done.
 Delta compression using up to 8 threads.
 Compressing objects: 100% (3/3), done.
 Writing objects: 100% (3/3), 956 bytes | 0 bytes/s, done.
 Total 3 (delta 0), reused 0 (delta 0)
 To ssh://repouser@host-01/home/repouser/website-repo/
 * [new branch] master -> master
Note: In future usage you’ll only need to invoke git push, the origin master command here creates your master branch for the first time only.
Setup an HTTP Server with Home Directories
We’re going to be using the Apache web server on CentOS and utilize local user public_html directories, this way we won’t require root credentials for anything. First, install Apache on the remote server:
yum install httpd -y
Enable User HTTP Directories
sed -i 's/UserDir disabled/Userdir enabled/' /etc/httpd/conf.d/userdir.conf
sed -i 's/#UserDir public_html/UserDir public_html/' /etc/httpd/conf.d/userdir.conf
Set Permissions and Restart Apache
chmod 711 /home/repouser
mkdir /home/repouser/public_html
chmod 755 /home/repouser/public_html
chown -R repouser.repouser /home/repouser
systemctl start httpd
systemctl enable httpd
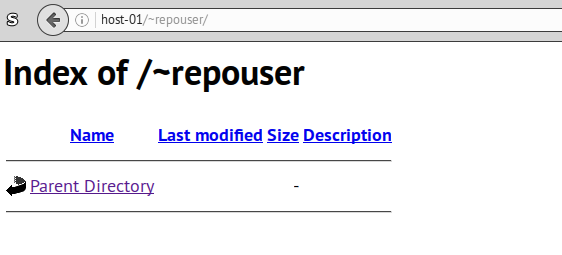
Now you should have a nice, generic HTTP index visible at http://reposerver/~repouser
Create your Git Hook
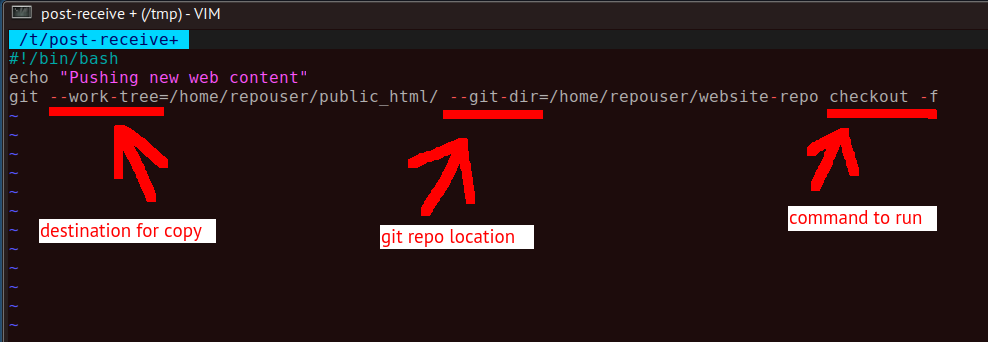
Now we’re ready to setup our post-receive hook, this will copy any changes we make to index.html into our main HTTP index in Apache. Back on your server as the repouser local user run the following command:
cat > /home/repouser/website-repo/hooks/post-receive << EOF
#!/bin/bash
echo "Pushing new web content"
git --work-tree=/home/repouser/public_html/ --git-dir=/home/repouser/website-repo checkout -f
EOF
Now set our post-receive hook as executable
chmod +x /home/repouser/website-repo/hooks/post-receive
Let’s look closer at our post-receive command to see what it does.
Test Pushing Content with Git
Now you’re ready to test pushing content on your laptop/desktop or remote machine where you previously cloned the website-repo Git repo.
cd website-repo
echo "$(date) is my latest update" > index.html
git add index.html
git commit -m "testing git post-receive hook"
If all went well you should see output like the following:
Counting objects: 3, done.
Writing objects: 100% (3/3), 305 bytes | 0 bytes/s, done.
Total 3 (delta 0), reused 0 (delta 0)
remote: Pushing new web content
To ssh://repouser@host-01/home/repouser/website-repo/
   f7e6932..fedc356  master -> master
Refresh your browser and you should see the content updated:

It’s magic! You get the idea, you can build a lot more advanced functionality inside your post-receive hooks – this is just a very simple example to show you how it works.
If you like this rather simple approach to Git-controlled web content management you might checkout Jekyll as a framework to build upon.
Extended Git Workflow Examples
Git is a great mechanism for managing configuration management code. The branching functionality works very well when aligned to server/resource classification. You can have one codebase across development, QA, staging and production servers and only merge the battle-tested code into production once it’s ready.

Git and Configuration Management
Building on top of the above illustration you can use software like Gerrit to provide robust peer review and gating to further granularity in how code is scrutinized and approved. Processes like these form the backbone of well-designed infrastructure-as-code and continuous integration systems. 
In the above example someone proposes a code change to land across servers driven by a particular Git branch. This change is first reviewed by peers and perhaps a CI system like Jenkins. Once it receives the necessary approvals it’s merged and pulled into your configuration management system of choice and pushed out to the respective servers to take effect.


This post on Git Hooks is a total game-changer! Who knew automation could be this much fun? The way it simplifies complex tasks and adds a touch of magic to my workflow is mind-blowing. Thanks for turning what seemed like a coding chore into a cool and efficient process. Time to level up my Git game with these awesome tips!
LikeLike