
![]() I’ve been a long-time vim user, dating back to when I figured out how to exit the damn thing. Over the years I’ve tried various vimrc configurations, plugins and looks and even other editors but I’ve always come back to it for a few reasons: the main one being that you’re guaranteed it will be installed on any server you touch. I’m sharing my vim setup here and how to use the same one if you like it.
I’ve been a long-time vim user, dating back to when I figured out how to exit the damn thing. Over the years I’ve tried various vimrc configurations, plugins and looks and even other editors but I’ve always come back to it for a few reasons: the main one being that you’re guaranteed it will be installed on any server you touch. I’m sharing my vim setup here and how to use the same one if you like it.
Why Customize?
If you dabble in any development or write ops tools you’ll most likely want language-specific syntax highlighting, buffers, git support and some extended functionality. The plugin architecture and availability of plugins are very plentiful if not downright overwhelming. Here are the plugins I use currently:
- vim-plug (simple vim plugin manager)
- gnupg-vim (useful for encrypted files and resources)
- vim-ansible-yaml
- vim-python-pep8-indent
- vim-airline (adds useful icons, coloring, tab/buffer/split behavior and more)
- tabular (text alignment)
- vim-colors-solarized (more colors and looks)
- vim-fugitive (git branch awareness and more)
- vim-jinja2 (jinja2 template syntax)
- tmux-vim (tmux and vim compatibility and fixes)
- tmux-complete (insert mode completion of words in adjacent tmux panes)
- nerdtree (file manager / tree explorer for vim)
- vim-jedi (Python syntax completion in vim)
- vim-powerline (enhanced status line)
- vim-obsession (continually save vim sessions every 15minutes)
- ctrlp (search/complete files plugin, control + p to activate)
- syntastic (highlights common syntax errors in many languages)
- ale (asynchronous lint engine)
How to Try this Setup
To quickly get the same setup as me you’ll need to run the following commands. I have provided a tarball of my ~/.vim and ~/.vimrc that already have the above plugins setup and configured.
Install any necessary packages first. I use Fedora, so substitute yum for CentOS/RHEL or your appropriate package manager. If these aren’t packaged in RPM you can manually add them via the Plug Vim plugin manager. This will also work on OSX by using the tar I provide, see below for further setup instructions needed in ~/.vimrc.
dnf install git vim-enhanced
Install Additional Syntastic Packages
I also install these packages from my distribution for syntax support, your mileage may vary.
dnf install vim-syntastic vim-syntastic-python vim-syntastic-json vim-syntastic-html vim-syntastic-spec vim-syntastic-sh vim-syntastic-yaml
Backup your Current VIM Files
(as normal user)
Backup your current ~/.vim and ~/.vimrc just in case you hate it, then you can revert everything and complain about it in the comments.
mv ~/.vim ~/.vim-bak ; mv ~/.vimrc ~/.vimrc-bak
Download vimfiles
The regular version comes without the full code completion engine for most languages, quality-of-life highlighting, git awareness and Python syntax via docstring lookups is included via jedi.
Download vim files and extract them.
cd ~
wget https://github.com/sadsfae/misc-dotfiles/raw/master/vimfiles.tar.gz
tar -xvf vimfiles.tar.gz
Vim Files MD5 Checksum
4f521e4b41876520700997314d346c76 vimfiles.tar.gz (84M)
Setup Vim Plugin Manager
Open Vim and use the Plug package manager to install and update all the plugins. You can just use things right away but it’s better to clone and install the latest versions.
vim
:PlugClean
This command above cleans the current git repos, which are currently set to my file hierarchy.
:PlugInstall
The above will install the latest version of the plugins.
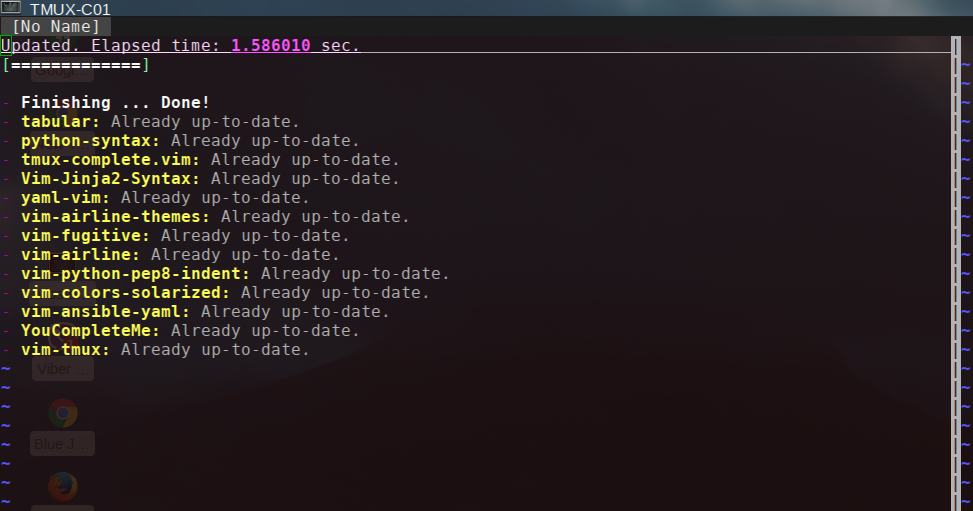
Use :PlugUpdate to update all the plugin git repos going forward when you like.
:PlugUpdate
Set System Variables
Set some variables to not anger your system (like crontab or git).
git config --global core.editor /usr/bin/vim
echo "export EDITOR=vim" >> ~/.bashrc
Install Powerline Fonts
At this point you’re ready to go, however you may want to install the powerline fonts, they are quite nice. This works on Linux or OSX.
git clone https://github.com/powerline/fonts
The installation script installs the fonts locally.
cd fonts
sh install.sh
OSX Only – Edit ~/.vimrc
You need a few more lines in ~/.vimrc if you’re using OSX.
"""""""" OSX ONLY
set guifont=Inconsolata\ for\ Powerline:h15
let g:Powerline_symbols = 'fancy'
set encoding=utf-8
set t_Co=256
set fillchars+=stl:\ ,stlnc:\
set term=xterm-256color
set termencoding=utf-8

if has("gui_running")
 let s:uname = system("uname")
 if s:uname == "Darwin\n"
 set guifont=Inconsolata\ for\ Powerline:h15
 endif
endif

"""""" END OSX

"" SET UNICODE
set encoding=utf-8
set guifont=Source\ Code\ Pro\ for\ Powerline "make sure to escape the spaces in the name properly
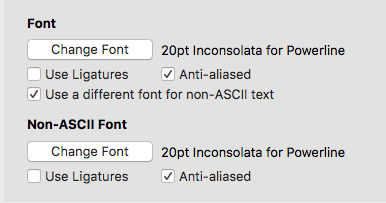
OSX Only – iTerm2 Profile
If you use the iTerm2 terminal on OSX you’ll need to now set the font appropriately in your profile.
Use Italics for Comments
To use italics for code and config comments follow this guide, otherwise you’ll want to comment out this line in your ~/.vimrc
highlight Comment cterm=italic
What it Looks Like
Utilizing nerdtree (control + n to open/close) which is useful when editing many files.
Use T to open files as new vim tabs in the background, see tips below for more commands.

Working with SCM
Fugitive plugin adds useful git branch information and functionality.

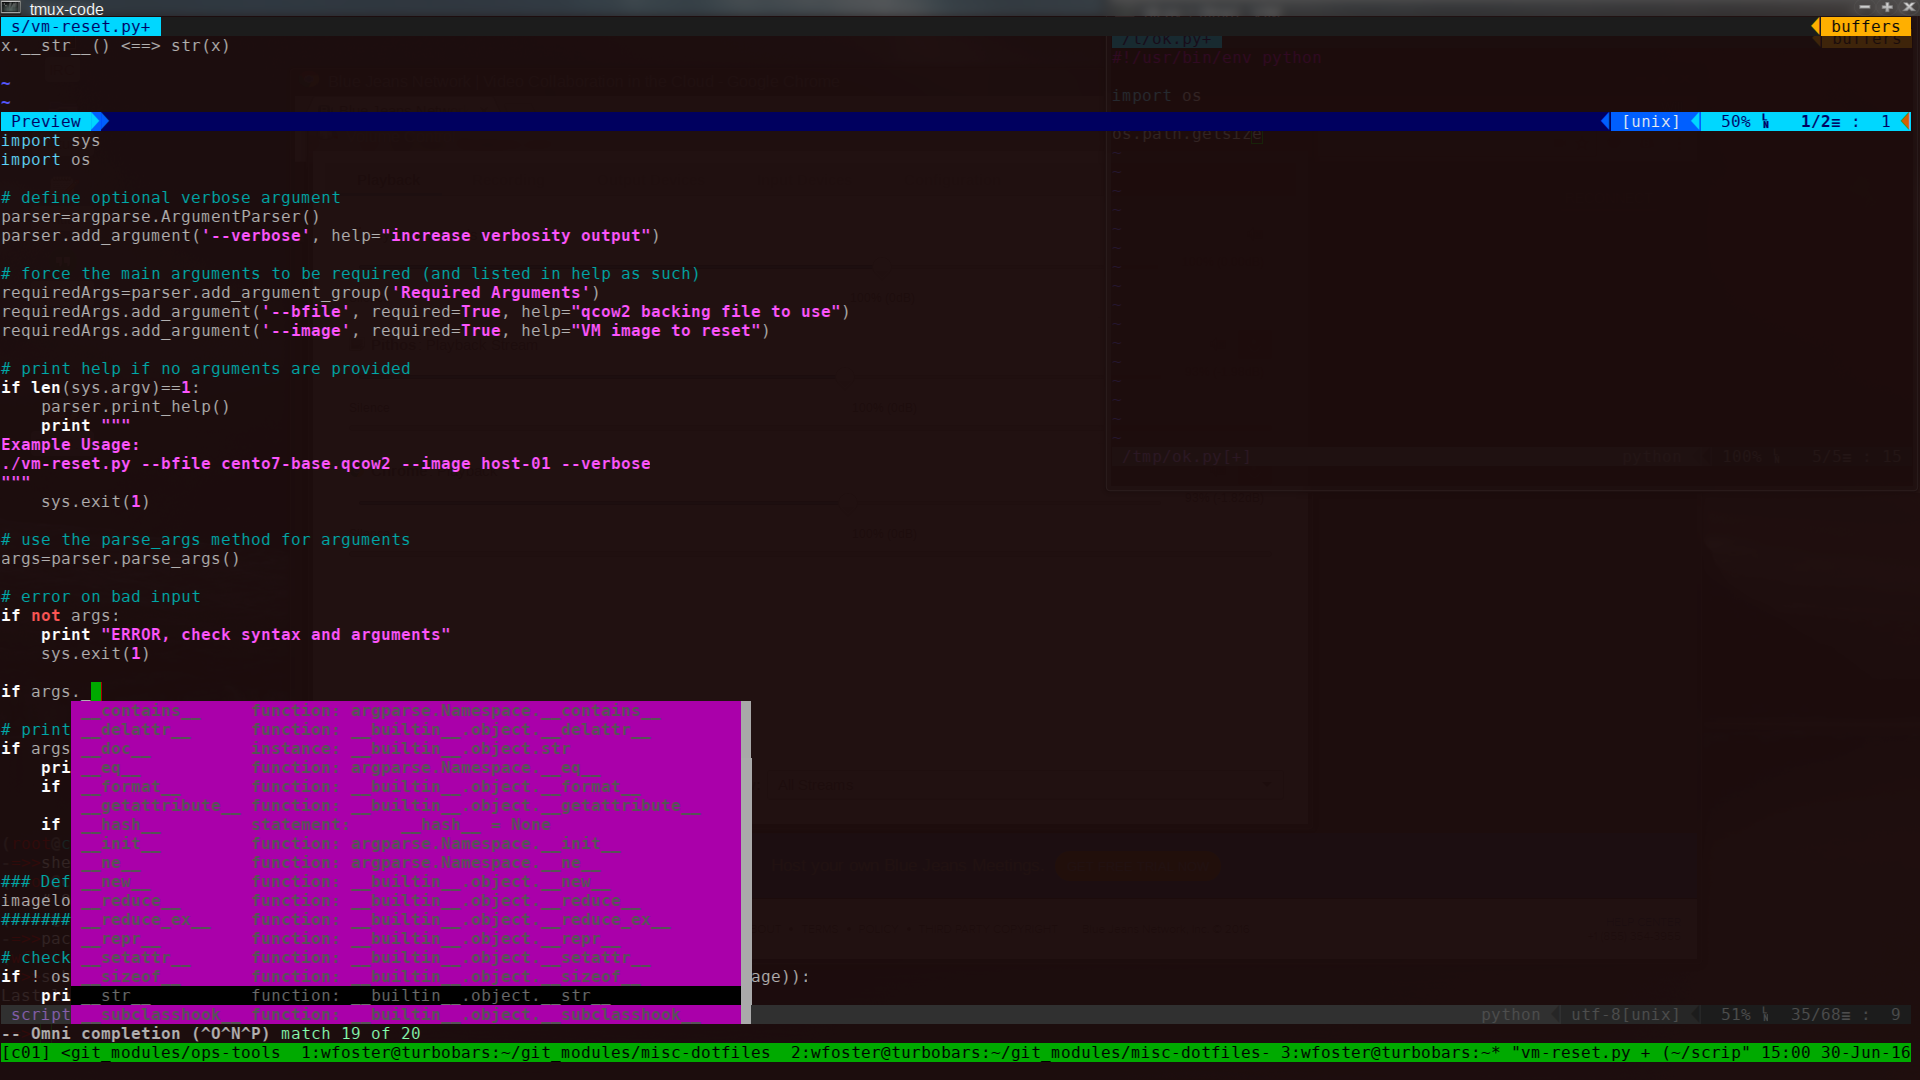
Code View with Python
Using vim-jedi (control + space auto-completes possible library syntax and shows docstring info).

Things work in tmux as well, yes you can change the background color.
ALE (asynchronous Lint Engine)
This does real-time linting of many languages and scripts, toggle on/off via :ALEEnable / :ALEEnable. To turn it off completely put let g:ale_enabled = 0 in your ~/.vimrc and then you can use the command :ALETo within vim to toggle it on/off as needed.

Control P – Search
The cntrlp plugin provides full search/autocomplete of files inside current git repository or directory hierarchy.

Email with Mutt
mutt compose is freshened up a bit with vim.

Updating Plugins with Plug
You can run :PlugUpdate to update your current plugins, or add new ones in your ~/.vimrc to install new ones:
Useful Vim Commands
This is a very small list, check other resources if you want to do something specific but here are some of the options I use frequently.
- :tabe <path/to/file> – opens a new or existing file in a new tab
- :tabnew – opens a new tab
- gt – switches to the next tab
- gT – switches to the previous tab
- :set paste – enables paste mode, I turn this off by default for wordwrap in mutt
- :set nopaste – turns off paste mode.
- :set list – turns on whitespace indicators
- :set nolist – turns off whitespace indicators
- :set number – turns on line numbers
- :set nonumber – turns off line numbers
- ctrl + space – toggles code completion for Python or string completion of used strings elsewhere.
- ctrl + n – toggles nerdtree file browser on/off
- T – opens files in new vim tab
- ctrl + w + w – toggles nerdtree focus
- r – refreshes current directory listings
- R – refreshes root directory listings
- m – filesytem actions: create, move
- a – create a file or directory
- m – move file or directory
- d – delete file or directory
- c – copy file or directory
- :sp – creats a horizontal split pane
- :vsp – creates a vertical split pane
- :sp <path/to/file> – opens an existing or new file in a horizontal pane
- :vsp <path/to/file> – opens an existing or new file in a vertical pane
- ctrl + ww – jumps between split panes
- ctrl + p – powerful file search/completion
- :%s/dog/cat – searches for dog and replaces it with cat
- v + direction arrows (or pgdn/pgup) – visual mode and text selection
- y – yanks (copies) selection to a buffer
- P – pastes the selection where your cursor is located
- :s/dog/cat – you can also search/replace within highlighted text
Feedback
Am I missing any useful vim plugins? Let me know in the comments and I’ll try them out and update the guide here.


Hey Will — just wanted to thank you for this package. I’ve recommended this post so many times now, and every time I spin up a new VM I have to hunt down the link. Which is now in a comment in my vimrc, and I may as well post it on Mastodon and Bluesky as a boost and and also a backup bookmark. Appreciate you, sir!
LikeLike
Thank you Rick! Hope it was helpful.
LikeLike