If you’re looking for a quick, easy way to setup repository-based CI for your Ansible playbooks on Github consider Travis CI, it’s also a breeze to set-up for larger projects and not that involved. This takes around 10 minutes to get in place for Ansible Playbooks, let’s get started.
What Does Travis CI Provide?
Travis CI is one of many continuous integration platforms that can automatically run pre-defined tests against your code and record the output (typically success/fail) when changes or proposed changes occur. This provides a layer of automated code testing before humans have to review any proposed changes. Travis CI is a free hosted platform that requires no external resources from you.
This is important to me as I maintain several popular Ansible playbooks for Sysadmins/DevOps folks and I sometimes get pull requests. Having a simple CI layer in front of any proposed pull request (patch) or for every change saves me time and helps eliminates errors later. I also don’t want to spend a lot of time on this when a simple ansible-lint run will do for automated testing.
What is our Focus?
In this example we’re going to setup Travis CI to run the ansible-lint program against any new proposed or pushed changes to the branches we associate with it inside a Github repository. This guide is focused on Ansible playbooks stored in a public Github repository, but could be extended to cover a wide variety of proper testing and CI workflows for other types of code and applications.
Requirements
You’re going to need a few things to get started.
- Ansible playbooks stored in a Github repository
- A .travis.yml configuration file in your repository
- Allow Travis CI permission to your repositories.
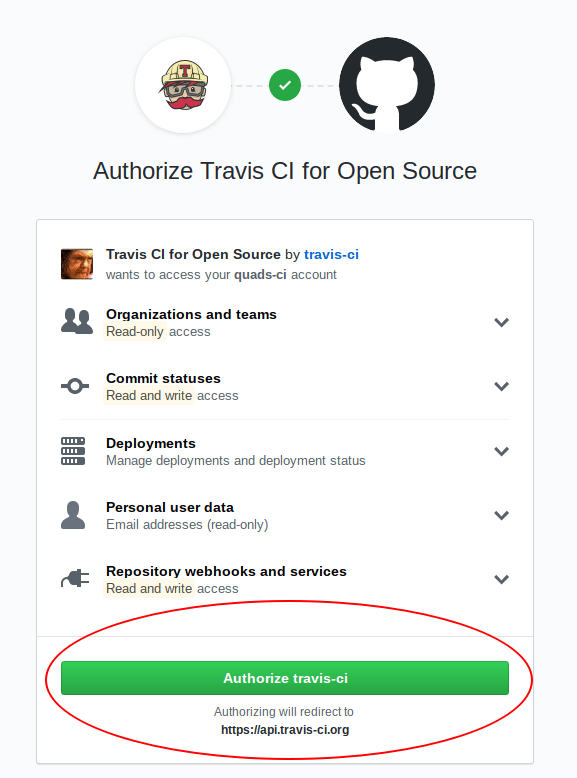
Enable Travis CI Repo Integration
First you need to login to Travis CI with your Github credentials, just click on the login with Github button and it’ll redirect you to Github login.


Once logged in you’ll be presented with authorizations for allowing Travis CI to access aspects of your repositories. This doesn’t seem too overreaching for me, assuming all of it is probably needed to provide meaningful CI platform for you for free.
Enable Travis CI for your Target Repositories
After authorizing Travis CI you’ll be redirected to the Travis CI dashboard, from here you’ll see all of your available Github repositories.
I am going to enable Travis CI just for the Ansible playbooks where I want to have CI run for every commit or pull request.

At this point you’re done with the Travis CI / integration parts and the rest of the configuration will happen inside your individual Github repositories.
Develop and Finalize your Tests Locally
Before we ask an automated system to run tests against our code need to ensure we get the right tests locally beforehand.
I’m going to be using the ansible-lint program for testing syntax errors, typos and other issues against Ansible playbooks. You can substitute this for any kind of testing that returns repeatable exit code status for your project.
For me, installing ansible-lint in Fedora:
dnf install python3-ansible-lint
Refer to your distributions packaging commands as needed. You could also install this in a virtualenv if needed.
virtualenv playbooklint
. playbooklint/bin/activate
pip install ansible-lint
With ansible-lint installed let’s see what comes up when we scan our Ansible playbook.
# cd ~/git_modules/ansible-elk
# ansible-lint install/elk.yml

[303] systemctl used in place of systemd module
/home/sadsfae/git_modules/ansible-elk/install/roles/apache/tasks/main.yml:38
Task/Handler: Start httpd service
Chances are, you’re going to see a lot of warnings but no errors if you have working code. In my case I had a bunch of style-related suggestions, deprecation warnings and lots of other lint-related suggestions of how to improve the playbook.
After review you have a few choices here, you can omit certain checks/warnings that you simply don’t care about right now or take the time to curate your playbook to be clear of the warnings that might crop up.
I am going to choose to omit deprecation and style-related warnings for now because I want to get the CI in place and only care about errors, we can always circle back and fix warnings later.
Like flake8 for Python, checks by ansible-lint will catch errors and syntax/code problems in addition to warnings which is what I’m mainly after here.
# ansible-lint install/*.yml -x 303,701,601,206,602,403,301,502,306
We can see that I’ve omitted a handful of warnings with the -x command above.
We can see below that my exit status is zero, so it would be considered a PASS if Travis CI runs this for us.
# echo $?
0
Construct your Travis Configuration File (.travis.yml)
Now that we’ve got a repeatable test it’s time to finish our Travis CI integration. Inside your repository you’re going to want to create a .travis.yml
vi travis.yml
language: python
python:
- "3.6"

# command to install dependencies
install:
- pip install -r tests/test-requirements.txt
# command to run tests
script:
- ansible-lint install/*.yml -x 303,701,601,206,602,403,301,502,306 -v

# tell galaxy about new builds
notifications:
webhooks: https://galaxy.ansible.com/api/v1/notifications/
Note: You do not need the Galaxy notifications/webhooks line unless you have your Ansible playbook on Ansible Galaxy and want to trigger an import everytime a build is successful in Travis CI.
Construct your Test Requirements File
Since you’re calling ansible-lint in your CI test you need to include what package(s) should be installed first that your tests rely on.
mkdir tests
vi tests/test-requirements.txt
## Python requirements for running ansible tests
##
## pip install --requirement=test-requirements.txt
##
ansible-lint
After you’ve created your .travis.yml and your tests/test-requirements.txt files push these to each branch of every repository on Github where you want to enable Travis CI coverage.
Update README.md or Galaxy (Optional)
You also might want to modify your README.md to show the current build status.

[](https://travis-ci.org/sadsfae/ansible-elk)
Lastly, if you have your Ansible playbooks on Ansible Galaxy then you’ll want to add the following to your Galaxy configuration file: mine is meta/main.yml
travis_status_url: https://travis-ci.org/sadsfae/ansible-elk.svg?branch=master
Watch Travis CI Dashboard Progress
If all goes well, any push to a branch containing your .travis.yml that is enabled within Travis CI repository settings will run your test automation.

By default this also extends to pull requests too, which is the most useful thing for me when collaborating with other Open Source contributors on the internet.

If you’re using Ansible Galaxy you’ll also see fancy build status labels now.

By drilling into the Travis CI dashboard you can access individual test results across all builds and branches.

Extending Further: Using a Development Branch
While I am less of a fan of the Github-based code review and pull request system and more prefer Gerrit / Jenkins with CI pipelines (future setup guide coming soon) Travis CI for Ansible playbooks and other projects is good enough. Some people may prefer or be more used to a Github / PR workflow anyway and Travis CI can be a great compliment.
Since you’re mainly going to be working with pull requests I find it useful to make yourself a development branch so that changes you make can be pushed there first, then you can merge them as your own PR’s into the master branch.
External contributors would still submit PR’s via their cloned copy/branch but this way you don’t need to have a clone of your own repository to follow the same workflow.
Make a Development Branch
While in the master branch of your repository do the following:
git pull
git checkout -b development
git push origin development
At this point you’ll now have a development branch up on Github. You’ll still want to enable tracking for it so that it can be worked on in a distributed fashion, not just locally.
git push --set-upstream origin development
Now you can develop against your development branch and merge pull requests from your development -> master branch when things are tested and how you like it.
I also add Travis CI to my development branch as well for quick, automated tests to ween out any mistakes that might have slipped in while working on the code base.
More Advanced Travis CI Usage
While this guide is very simple, the approach is the same for almost all proper tests and coverage you might add to project CI managed by Travis.
For a good example of Python unit test coverage using mock and pytest check out Badfish, another Open Source project we develop for providing a vendor-agnostic redfish API tool for managing bare-metal server IPMI interfaces.
More on Setting up SCM and CI/CD Solutions
If you don’t already have your repositories on Github and might be starting fresh I would highly recommend Gitlab instead. It has very powerful runners which can be very granular and extensible for all types of testing and building. The self-hosted Gitlab is also a great solution if you’ve got internal resources and want to run a mostly on-premise implementation of SCM, CI/CD and project management.
More on Learning Ansible
If you’d like a quick, down-to-earth jump start into learning Ansible automation I have created an Ansible video course called Practical Ansible Solutions for Packt Publishing which might interest you.