
 Recently the SSD Operating System disk on my primary work desktop failed without warning and no manner of arcane xfsrepair or xfsdump/xfsrestore chicanery would bring it back. Luckily I had SpiderOak backups as my employer offers this as a service to associates. Being the first time I’ve needed to restore data with SpiderOak here’s some things I’ve learned and impressions of the service on Linux.
What’s SpiderOak?
SpiderOak is a blind (zero knowledge) encrypted cloud backup and file sharing service – only you have access to the encryption keys and it’s encrypted at rest and in transit so SpiderOak itself cannot access your data. It also deduplicates all common data across all your devices which can be useful. It works natively on Linux, Windows and OSX and mobile clients.
What I’m Going to Cover
I’m going to cover the following items here in hopes it is useful to others.
- Experiences in a data loss / restoration scenarios using SpiderOak
- How to restore data from SpiderOak backups from a failed device
- How to setup backups on a schedule with the SpiderOak Linux desktop version
- How to setup backups on a schedule via the SpiderOak CLI
My Thing Crashed
I first noticed there was an issue with my Fedora desktop when opening the Remmina application, it contained none of my settings, the theme was distorted and something was off. Looking at logs there were all manner of I/O and disk hardware errors. I was unable to read, copy or view data in any way.
I then booted to a Fedora LiveCD to investigate further and hopefully run an xfs_repair. After accessing my Luks-encrypted LVM volumes I was unable in any way to mount the filesystems or repair them, I even tried using alternate superblocks and read through quite a bit of debug documentation to no avail.
I had physical damage to the disk and eventually it stopped being identified by the OS. There is nothing pro about my Samsung 850 SSD Pro, it died in less than 6months and I’ll try to get a replacement.
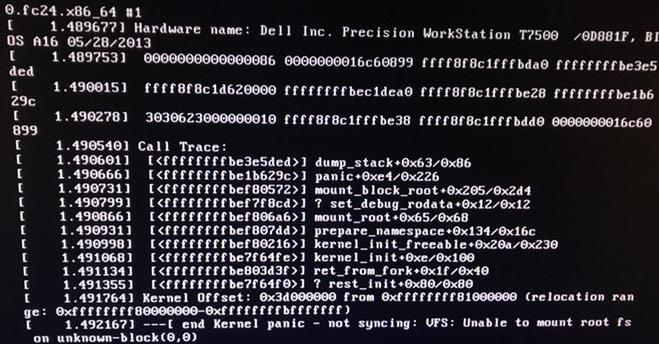

Later versions of XFS (xfs_repair) will attempt to mount multiple superblocks (secondary, tertiary) that it knows about if the primary fails. Usually, with little exception if this fails you’re better off restoring from backups. This is where we are.
Restoring from SpiderOak
My SpiderOak backups were about a week old, I wasn’t backing up my /home (where anything important is kept) on an interval but instead whenever I felt like it or before traveling – I made a mental note to stop doing it this way.

In my case the fastest recovery path was to replace the failed disk and re-install the OS (Fedora 24 at time of failure, moving to Fedora 26 for re-installation). Then I could install SpiderOak and perform a file-level restore of the items from my home directory.
My recovery plan looks like this:
- Replace failed disk
- Reinstall Fedora (version 26 as of writing this)
- Install SpiderOak Groups
- Register my desktop as a new device
- Download files from my previous backup of the device.
- Copy them into place.
- Complain about it on the internet
SpiderOak has some documentation about restoration here which I loosely followed. The important thing to note is that I was already running as the same username / uid / gid as my previous desktop in X11 and a lot of my files were specific to my desktop environment (XFCE) as well as application, browser and environment settings so I did not want to copy them directly into place.
Instead, I made a /home/restore directory and set permissions to 777 and used that as the initial restore location.
mkdir -p /home/restore
chmod -Rv 777 /home/restore
Later after I’ve restored my files here I will log out to runlevel 3 and copy them into place, ensuring the currently running desktop configuration would not conflict in any way.
Install SpiderOak
After a quick, fresh Fedora installation the first step for restoration of data is to install SpiderOAk. You can substitute yum or apt-get depending on your distribution below.
dnf install SpiderOakGroups.6.3.1.1.x86_64.rpm -y
Once complete open SpiderOak, login with your account and register your computer as a new device.
At this point SpiderOak will run through a few lengthy synchronization processes, this will take a while.

This will run for quite some time, it will download metadata and views of all the other devices and data you’ve backed up.

Lastly it will build a local snapshot. Again, this will take a long time so go get some coffee or take a walk.
Restore Files from Old Device
When SpiderOak is finally ready it will present you with the standard screen, you’ll see all the devices you’ve backed up and have access to their files.
Click on the Manage tab.
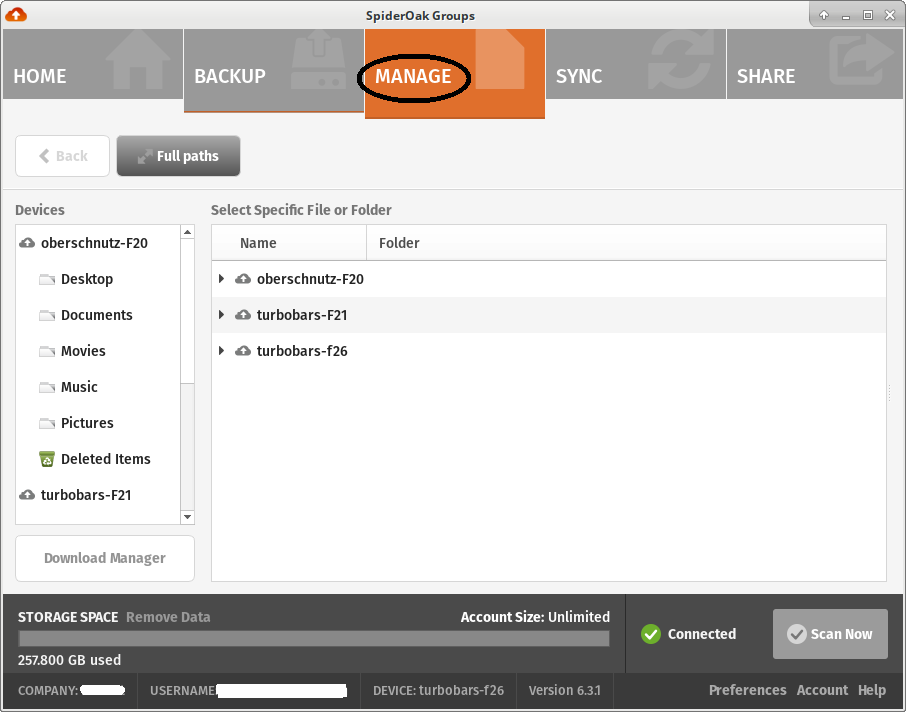
Now you can drill down into individual files and directories inside each device backup, I found it was better to click on the first file then shift-click down to the last selection and do them in batches as SpiderOak is very slow.

Once you have your data selected, click Download. You can always do this in batches as well.
Next, you’ll be presented with the download manager dialogue, this is where I deviated from the instructions.
Instead of selecting to restore the files back into my current home directory I instead pointed it to the /home/restore directory I had setup earlier.

I placed all my restored home directory files into /home/restore/
Once this is in progress you can watch it via the Download Manager. This takes a long time depending on the sheer number of files and directories you have. Sometimes I had to cancel this and do it in smaller batches.

I can’t stress this enough, this could take a very long time. For me it took around 48 hours to restore around 200Gb of data, with many, many files and git repos and the like.
Copy Data into Place (if copied to alternate location)
If you chose to restore directly back to your original locations you’re done, you don’t need to do anything else. Since I opted to copy first into /home/restore I need to rename my home directory in run level 3 as root, copy the new files in and make that my home directory. Here’s what I did.
sudo telinit 3
I then logged into a Linux TTY via control+alt+f3 as root, renamed my current (temporary) home directory I used while logged into X11 to do the restore and moved the restored copy over to it.
mv /home/wfoster /home/wfoster_old
mv /home/restore/wfoster /home/wfoster
chown -Rv wfoster.wfoster /home/wfoster
Once this completes you can either issue telinit 5 or simply reboot and all your data should now be back.
Backing Up with SpiderOak on an Interval
As we mentioned above I wasn’t running regular SpiderOak backups so I did lose a day or two of notes. Luckily for me most of my really important work goes into distributed git repos however. That said let’s set SpiderOak to backup on a schedule.
Open SpiderOak and click on Schedule underneath the Backup status.

Next, select a schedule that makes sense for you. I used every Sunday at 1am.

Lastly, I didn’t want to keep SpiderOak running all the time so I made a cronjob to start it on my current X11 desktop at 12:45pm on Saturday – about 15minutes prior to when it needs to run.
crontab -e
Add the following
### launch spideroak on sundays
45 0 * * 0 DISPLAY=:0 /usr/bin/SpiderOakGroups >/dev/null 2>&1
Now SpiderOak will launch 15 minutes prior before it will be scheduled to run, and it will run automatically and perform a backup.
Using the SpiderOak CLI
I’ve got a few headless test servers that I am using to backup VM data besides my work desktop and laptop. SpiderOak has a full-featured CLI that can be used for servers in this fashion.
Install SpiderOak
You can use the same RPM you used earlier with your desktop or laptop on a server.
yum install SpiderOakGroups.6.3.1.1.x86_64.rpm
Setup your Account
Here you’ll login to your SpiderOak account and setup a new device. The –setup=- denotes setting up a new device.
SpiderOakGroups --setup=-
Login: wfoster@example.com
Password:
Logging in...
After you’ve logged in for the first time you’ll get some prompts, you want to create a new device. It may also ask to verify your fingerprint. This will take some time so best run it in a screen session.
Please enter a name for the new device: virt-hypervisor-el6
Setting up new device...
Finalizing device setup...
Synchronizing with server (this could take a while)...
Setup your Target Backups
Next you’ll want to add directory paths that you want backed up. To list what is currently in scope for backups:
SpiderOakGroups --selection
Current selection on device #5: u'virt-hypervisor-el6' (local)

Dir:/root/Groups Hive
ExcludeFile:/root/Groups Hive/Desktop.ini
ExcludeFile:/root/Groups Hive/.Icon.png
ExcludeFile:/root/Groups Hive/Icon
ExcludeFile:/root/Groups Hive/.directory
You can now start adding directory paths to backup. In my case I keep weekly copies of my running VMs locally, I want to back those up where they sit on the local filesystem.
SpiderOakGroups --include-dir=/home/backup-virt
Now you should see the new directory path(s) being included, do this for everything you want backed up.
Including...

New config:

Current selection on device #5: u'virt-hypervisor-el6' (local)

Dir:/home/backup-virt
--snip--
That’s it! Now SpiderOak is setup to backup your stuff. Go ahead and do a first sync, this will take some time, but subsequent syncs shouldn’t take long unless you have encrypted content that cannot be deduplicated.
SpiderOakGroups --batchmode
Backup via CLI on a Schedule
The batchmode option above will tell SpiderOak to run backups and then exit. You’ll want to put this on a schedule so it happens automatically.
I used the following entry in my root cron for this via crontab -e.
9 5 * * Sat /usr/bin/SpiderOakGroups --batchmode
Restore via CLI
You can easily restore via the CLI via the following command. Consult the documentation for more advanced CLI usage. You can use –simulate to tell you what it would do.
SpiderOakGroups --restore=/usr/lib/plexmediaserver
This will restore the above directory and contents to /root/Download/ for example.
Queueing download of journal 1633 on device #6: u'plx-server-el7',
folder u'/usr/lib/plexmediaserver', and 286 subfolders
Download of 0 bytes: Staging... (0 files)
Download of 189917848 bytes: Staging... (1345 files)
Download of 214779849 bytes: Staging... (2161 files)
Download of 230326749 bytes: 0% (0/2866 files)
Download of 230326749 bytes: 0% (0/2866 files)
Download of 230326749 bytes: 0% (8/2866 files)
Note: Watch Storage Usage
SpiderOak by default uses ~/.config/SpiderOak\ Groups or similar to store your hive file, this is piece of local encryption/queue metadata that can get quite large. As the default layout of most EL-based distributions is to have a relatively large /home and a smaller 50G or so / partition this can fill up quickly running as the root user.
I had to move my SpiderOak metadata over my /home partition and symlink it so my disk didn’t fill up!
mkdir /home/hive
chown -Rv root.root /home/hive
mv .config/SpiderOak\ Groups /home/hive/
ln -s /home/hive/SpiderOak\ Groups/ .config/SpiderOak\ Groups
Thoughts about SpiderOak
For my personal data backups I typically prefer something homegrown like an rsync-based backup solution, distributed git repos or in the case of backing up an entire OS/image something like CloneZilla. I am using SpiderOak here as it’s provided by my employer with unlimited storage and I tend to backup my work-related data on my employer run services. Here’s some pros and cons based on my experience in a recovery situation.
The Bad
SpiderOak is painfully slow. This might be due partly because of the encryption overhead but also that it’s written in Python which isn’t the fastest thing in the world. It does work but I can’t stress enough how intolerably slow it is to restore lots of small files and data. I had to stop the restoration process several times and do it in small chunks.
48 to 72hours is an unreasonable amount of time for this to take even with the encryption activity that occurs. This might be that I’m special and have a lot of small files and larger-than-average datasets in my home directory but I think this shouldn’t matter. There are certainly some things they can improve to speed up the recovery experience.
The Good
SpiderOak deduplication works as advertised. This might be important to someone who pays for a certain amount of data and doesn’t want to exceed that limit. This also factors into how much data and time it takes for you to perform backups.
This is less important to me as our corporate account allows for unlimited data. I suppose this is also good for SpiderOak as they don’t need to house as much on their end thereby lowering their infrastructure costs.

SpiderOak is designed around privacy and blind encryption, this is important for anyone doing cloud backups – I would consider it a hard requirement when storing anything sensitive on another persons computer/network. Even with personal data I always encrypt things via GPG for example before anything leaves my control.
As I mentioned that SpiderOak is slow for restoration with a lot of data, it’s quite fast for incremental backups once you’ve gotten a baseline first backup. It seems the deduplication really helps in this department.
One useful aspect of SpiderOak is that you have direct access to all the files across all your devices, and these are also revision controlled. You can setup sharing as well but I haven’t tried this.
Lastly, there are a lot of advanced options and a full-featured CLI for SpiderOak which I applaud and they provide properly packaged versions of their desktop client in both RPM and .deb which is nice to see.


now I know my life has purpose! ;-) good article without the corporate spin, I know what to expect from it now.
LikeLike
Thanks Ben!
LikeLike
Thanks for the insights Will. I’m looking for a simple cloud-based backup solution after Crashplan decided to give up on the consumer market, and this was very useful indeed. It seems the client isn’t quite up to the Crashplan standard (which isn’t itself fantastic); I particularly appreciate the “background” aspect of Crashplan where it streams when idle and you don’t have to set a schedule. Is there any particular reason you don’t use the “automatic” schedule in Spideroak?
Cheers
LikeLike
Hey Alex. SpiderOak can also sit in the background and keep things continually updated if you like. I prefer to have it only fire off on an interval because it does hit CPU cycles quite a bit (and battery charge when I’m on my laptop) so I prefer to run it this way instead. It’s just personal preference I don’t like a lot of stuff running as I’m often doing other testing with VMs or other work-related things.
LikeLike
Thanks so much for the write up. It will very useful for me to decide to use this service. Question. Do you have to an instance on each device . I’ve got desktop and a headless server both running Gentoo Linux. Combined I’ve got 300gb of data to backup.
LikeLike
Hey, I’m glad you found it useful. So far as devices, each device/OS will count as a “Device” in SpiderOak so yes, different instances. There’s some stuff that happens with assigning device ID’s that distinguish one platform from others. One useful feature is that you can browse the files from any of the other device from within either the CLI or the desktop UI. If you have similar data on both devices de-duplication will pick up on this and won’t carry over any redundant data. Be warned the initial crawling and indexing that happens is a bit slow but it goes quick after you get a baseline backup, Python isn’t the fastest thing in the world :)
LikeLike